Working with office software is no longer cumbersome and tedious as today’s editing tools are miles better than the cryptic interfaces and workflows many of us might have encountered during our work in the past. However, the good thing is that technology has been changing for the better when it comes to using such software, especially when editing PDF documents.
In short, a PDF editor is one of the best things you can use to edit, polish, and prepare your files for any job. Professional PDF editing software is also so widely known and used that there are already multiple software solutions in place. But most of all, a great PDF editor can be your best buddy and support you in everyday PDF tasks. Equipped with its handy tools, you can seamlessly learn how to edit texts and images, convert PDF to Word, Excel, ePub, and much, much more! In addition, it is especially useful when you need to sign PDFs on the go.
Long story short, a PDF editor can give you access to a bunch of resources that will significantly help you in both office-related tasks and when working on personal projects at home. Let's take a brief glimpse at some of the main and most helpful things one can do with PDF editing software.
How to add and edit text in PDF with PDF Extra
One of the biggest features that PDF Extra provides is the ability to add new text to PDF files. Of course, this goes hand in hand with text editing. We’re not inventing the wheel here when we say that text is one of the main ways we communicate and present ideas and concepts in both documents and everyday life. However, just putting words together might not be enough in some cases as you may also need to use more advanced functionalities that may be lacking in your word-processing software. Things like layout, design, and other rich text editing options become simple with the right PDF editor.
With PDF Extra, text editing becomes child's play. All you need to do is follow a few simple steps:
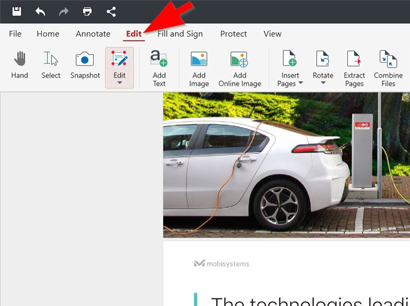
- Open your document in PDF Extra, click the "Edit" button, or expand the "Edit" dropdown.
- Click "Show Editing Tools".
- You will now have access to the "Editing Tools" panel on the right side of your screen. This allows you to use the editor while simultaneously seeing all the changes you make to your document right away.
- To change a given piece of text, simply select it and use many of the available features: apply a different font or font sizes, tinker with spacing options, choose different coloring and scaling, etc. – go as crazy or as low-key as you need.
A picture is worth a thousand words (or how to insert images)
While we can all probably agree that written content is king, some people might find reading long-winded paragraphs exhausting and will welcome some visualization. This is why our PDF editor also offers you a variety of built-in options to enrich your documents with images. Besides simply adding images within a PDF document, you can also replace, rotate, or move them in front or behind other elements in the document in order to meet your project's needs.
How to insert a picture in a PDF
Just like most editing options in any PDF software, inserting, editing, or deleting images is effortless. In fact, it is almost as natural as snapping your fingers and waiting for the magic to happen. Here is how this works.
1. Open a PDF document.
2. Click the "
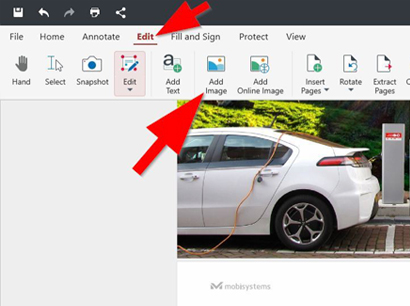
Edit" tab.
3. You'll see an "
Add Image" button in the main ribbon. Click it.
4. On the Windows operating system, this will open the native Explorer file dialog, from where you can choose the image that you want to add.
5. Once you find the necessary image, select it and click "Open".
6. Left-click the image to position it in the desired spot within your PDF document.
Besides adding images locally, you can also quickly insert any image you found online – after clicking the "Edit" tab, simply choose the "Add Online Image" button and search the internet database for the image you’d like to add. The principles of positioning an online image in your PDF document are the same as when adding an image from your device.
After you include an image in your PDF document, you can also easily manipulate and edit it. Here is how to do it:
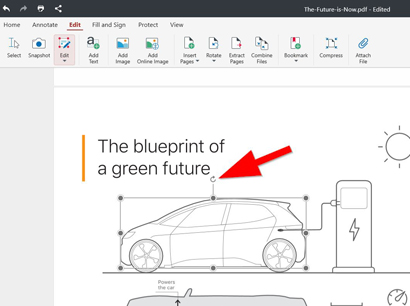
- After inserting an image in your PDF document, left-click on it.
- The software will display adjusting points marking the edges of the image.
- Left-click on an adjusting point and drag toward the position you need.
- If you need to reposition the image anywhere in the document, simply hover over it, left-click, and drag it to the necessary location in the file.
Additional options for editing PDF images
In addition to what we've discussed above, you can also edit your images using additional PDF Extra features. Simply right-click on the image and the PDF will display a tab with a few helpful options – "Cut", "Copy", "Replace Picture", "Arrange", and "Delete".
How to rotate images
Rotating an image in PDF Extra is as fun as spinning on a carousel, minus the danger of getting all dizzy. To rotate an image, simply left-click it. Then, once the adjusting points appear, left-click and hold the upper “rotation symbol” and move it to the desired position.
How to create a PDF from scratch
Logic dictates that before editing a PDF, you should create one first. Let’s include some of the main ways you can quickly and easily do that.
Create PDF from an image
This can be easily done with the following steps: Open PDF Extra →Click File → Create → From Image. Next, the software will open a dialog window from which you can select an image from your device. Finally, select the image you want and click Open.
Create PDF from scanner
This option allows you to make a PDF document using a scanner connected to your device. The steps here are as follows: Open PDF Extra → click File → Create → From Scanner. If you don’t already have a scanner configured, the application will ask you to add a scanning device via the "Add Scanner" button. Afterward, simply scan the document and PDF Extra will create a brand new PDF file for you.
Create PDF from a blank document
Sometimes, you need to start from a clean slate. Creating a PDF from thin air is straightforward, too. Here are the steps: Open PDF Extra → File → Create → Blank Document. Then, use the properties dialog box to adjust the page size and orientation and confirm your choice with OK.
Create PDF by combining files
This is an additional and effective way to create a new PDF document. After you open the app, click File → Create → Combine Files. Then, select the files you want to use and confirm your choice with the "Combine" button.
Final thoughts
As you can see, all the above features offer you a fast lane to a well-polished and visually pleasing PDF document. In addition, they also serve as an excellent starting point for learning how to create files and edit images in PDF Extra from ground zero. So, even if you are new to this, learning to edit and fill PDFs will be nothing short of simple. You just need to experience it for yourself!